Tuesday, December 17, 2013

Our Christmas Card 2013

So you might be wondering why I've been so quiet lately. Well I have a fun announcement in the beginning of the New Year that I can't wait to share. It is craft related and it will explain my absence from my blog. Been working hard. :)

Until then, I did want to share our Christmas Card that I'm sending out this year. Believe it or not, I was inspired by The Simpsons t.v. show. Yes. I said the Simpsons t.v. show. LOL For those of you that watched it like me growing up, remember the opening scene with Bart writing on the chalkboard as part of his punishment?

I thought it would be fun to create a PDF that fit inside the Lawn Fawn's chalkboard stamp. So with a lot of help from my step-son, I created this...

It says, "I will not be on Santa's naughty list next year." over and over. ;)

Here is a closer look at the chalkboard that I grunged up with white pigment ink to make it look like chalk dust...


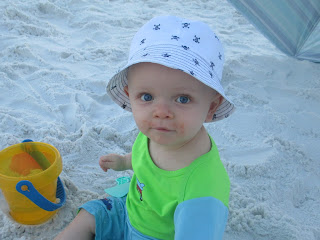
The inside reveals a picture of my little guy thinking, "Maybe.". Ha! ...
 
How's your Christmas cards going? Would love to hear about it.
 
Thanks for stopping by. Be back soon...

Monday, November 18, 2013

Caring Hearts Card Drive

First things first, the winner from THIS post is Loly Borda-Towery. Congrats! Email me with your address so I can send out some goodies to you. Thanks to all of you who participated in the Card Drive for Grayson.

Speaking of Card Drives, I wanted to share some mini cards I did for the Caring Hearts Card Drive. Jennifer and Vera have teamed up again in collecting holiday cards for the elderly in nursing homes. I decided to do several of the same design but with different greetings and patterned paper.
I started off with THIS die from Simon Says Stamp. Oh my. I'm in love with this die. It is called the "perfect bow" and it really is. I cut it from all kinds of different holiday Doodlebug patterned paper. Then I stamped sentiments from THIS stamp set and embossed it with the Swiss Dot embossing folder. I attached it to a 3.5 x 3.5 mini card. Simple and fun.


I decided to stamp a greeting on the inside as well. I finished it off with some Doodlebug sequins...
 
I'm hoping these cards will bring a smile to whoever receives them.

Thanks for stopping by! :)

Thursday, October 31, 2013

Happy Halloween!

Happy Halloween friends! I have a few shares for you today. I'm currently working on these....
...some treat bags for my nieces and nephews. I put some restaurant coupons, snacks, and some homemade cookies inside. The canvas bags are from Martha Stewart and the little tags are from Making Memories.

I also thought I'd share Aiden's pumpkin decorating pics. I taped off his initial with painter's tape before he painted on top. I also mixed some glow-in-the-dark paint in all the paint colors. Here is the before...


...and the after....
 
Well I'm off to get all the Halloween goodies ready. Aiden is going to be Mickey Mouse this year. Mommy is going to be Minnie. :)
 
I'll be back soon. Thanks for stopping by! 

Monday, October 14, 2013

Happy Mail for Grayson plus a PRIZE!

Hello! I'm participating in the Card Drive for Grayson and I hope you will join me! You can find out all the information HERE. Here is one of the cards I'm sending to the little guy...
Isn't those stamps the cutest!? You can find them HERE. As many of you know, I love to send a little something extra in my cards whenever I can, especially for kids. A peek at the inside of the card...
PLEASE join me in creating cards for this sweet little boy. He could really use a smile. LEAVE A COMMENT BELOW IF YOU PLAN ON CREATING A CARD FOR GRAYSON. I WILL PICK ONE PERSON TO SEND SOME GOODIES TO! (I will choose a winner on November 1st)
 
Thanks for stopping by!

Wednesday, October 2, 2013

On Trend: Navy and Pink

Hi Friends. I've been obsessed with the pink/navy color combo and thought I'd share a couple of card examples using it. This first card started with a navy base that was punched from THIS amazing punch. I originally bought it for Project life, but I'm finding myself using it on cards a lot....

I also love to partial emboss these days. It gives a perfect opening to place the greeting in. I also am in love with THIS stamp set with coordinating die. I love how many sentiment options it gives.

My second card can be found HERE. I did not take a photo of it but my sweet friend Joy did when she received it. Thanks Joy! :) It also uses the color combo and some fun stamping.

That's it for today. I hope you give this trendy color combo a try on your next project.

Thanks for stopping by!

Thursday, September 26, 2013

Insider Class-Day One

So I decided to sign up for the INSIDER CLASS yesterday and I'm so glad I did. I have been in a creative rut lately and this class has pulled me out and has opened my mind to many ideas. Here is a card I created after watching Day One's video.....


The class focuses on bringing your card from the outside to the inside with details. I decided to do a pop-up greeting on the inside....
 
So my advice to you is to run, not walk, and sign up for this class.You can find out more about it HERE. Happy crafting!

Until next time...thanks for stopping by!

Friday, September 13, 2013

Paper Smooches....

I'm a big fan of Paper Smooches Stamps! I recently got THIS stamp set and wanted to make a few cards with it.

I think these next cards will be great for Valentine's Day...


I have a lot of friends expecting babies so I needed MANY welcome baby cards. This stamp set was perfect for that. I wanted to make them all a little different but with the same idea for the design...


I created these cards pretty quickly thanks to the Paper Smooches coordinating dies. What a time saver! THIS is the other set of dies.
 
Well, that's all I got for today. Thanks for stopping by and have a wonderful weekend!

Saturday, August 31, 2013

Shaker Card Tutorial...


Hi! I am honored to be a guest designer over at the Little Tangles Blog today. Head on over to check out my photo tutorial on how to create this shaker card.....

"Shake it like a Polaroid Picture!" ;)

Have a great weekend!

Thursday, August 29, 2013

Cards with a little something extra....

Hello! I'm back today with a couple of cards that has a little something extra for the recipient just for fun. I find myself creating cards that keep on giving a lot these days.

This is a card that I made for my sweet friend Jana...
As you all know, I like Target. A lot. I always find the cutest things in their dollar bins. I bought a few of these light bulb shaped post it notes and included some on the front of the card for her to use.
On a side note, I chose this light bulb theme because it went with the gift I gave her that day. For her birthday, I got her one of THESE. I got one as well and LOVE it. It's a perfect mini light that I take to crops and retreats.
 
The next card is a card I made for my friend's daughter who started college this week. I wanted a fun and bright card, so I broke out the neon papers and inks and here is what I came up with....
I also found a neon pink library card pocket in my scrapbook stash so I stuck some spending money inside and wrote her a little note on it telling her good luck...
 
I hope this inspires you to put a little something extra inside your next card. Thanks so much for stopping by!

Thursday, August 15, 2013

For the love of enamel dots...

I'd thought I'd share a picture of my latest obsession. I can't seem to get enough of enamel dots lately. They seem to be the perfect finishing touch to any project. Here are a few examples..
 
I decided to play with some distress markers and a stencil to create the background of this card. Not really what I had pictured in my head, but I like it. Sometimes the happy accidents are the best part of being creative. I'm loving the blue/green color combo lately.

I also used some enamel dots to finish off the flowers on this card...
It's hard to see in the picture but I'm also loving white ink on kraft cardstock. It gives a ghost-like look. On this card I stamped the Hero Arts Envelope Background  stamp using THIS ink.
 
That's all I got for today. Have a great day!

Tuesday, July 30, 2013

This summer...

 
...has been very busy, but very fun. I noticed my last blog post was on the first of June (my poor neglected blog). So here's what I've been up to since then:
 
On June 2nd, I celebrated a birthday and was a lucky girl to be spoiled by my mom and hubby and received some Project Life to scrapbook with. Not just any Project Life goodies, but some signed by Becky Higgins herself. It was part of a big national contest and was just so fun to play along. ....
My sweet step-son Alex made me a list of concerts that were coming to Riverbend for my birthday and told me to choose any one I wanted him to take me to. I chose Matchbox Twenty and it was SO much fun. I'm a HUGE Rob Thomas fan so it was an amazing gift. Do I have a great kid or what! ? :)
Also in June, we went on a vacation with my whole entire family to Destin, Florida. It was so much fun and this little guy's first trip to the beach....
We have also been having fun hanging out with friends. On this day, we took my nephew J.T. to Chuck-E-Cheese. ...
And just this past weekend was my hubby's work picnic at Kings Island. My little man and I on the train...

So now that you see we have been busy just enjoying summer, I have a couple of creative shares. First up, a card inspired by Summer Card Camp 2, an online workshop taught by the amazing Jennifer and Kristina. Such a fun, inspiring class.
 
I used lots of Distress Stains on this card. I love how the embossed greeting resisted the stain and made it pop on the frosted vellum.

So, one more share I discovered through the web. You MUST check out this video. I was laughing so hard that I was crying. As a crafter, I can totally relate...


I hope it made your day as it did mine. Thanks for hanging with me and stopping by! Hugs!

Saturday, June 1, 2013

Guest Designer...

I am honored to be a guest designer over at A Blog Named Hero (one of my favorite blogs). Their theme/challenge for this month is masculine and they are featuring Neat and Tangled Stamps, which I am SO excited about. Danielle Walls is the owner/creator of Neat and Tangled Stamps and not only are her stamps adorable and high quality but so is she! I had the pleasure of crafting with her at a couple of retreats and she is super sweet.

Here are the projects I came up with. The first one is a card for my hubby for Father's day...
I used the woodgrain border stamp from THIS set along the bottom of the card to create my own patterned paper. I liked that it felt masculine. THIS stamp set from Hero Arts is great for masculine cards and I used it for the sentiment. For the two smaller colored cardstock strips, I used Hero's Butter Bar Ink and Wet Cement Ink and just swiped them along a piece of white cardstock. For the pool colored larger strip, I stamped THIS Hero Background with Tide Pool Ink. I added glossy accents to the wooden hearts. A closer look...

For my next card (the one featured on the A Blog Named Hero Blog), I was looking for some color inspiration and found it on the ink cubes sitting on my work station...

I think they fit the masculine theme so I created this card...

I absolutely love THIS stamp from Neat and Tangled and knew I had to use it. I stamped it with Wet Cement onto white cardstock. I stamped the greeting from THIS Hero set using Black Staz-On ink onto acetate and stapled it on my card. Then I added some die-cut stars that I swiped with the ink colors from above cube set and then gave them some shine with glossy accents. To finish it off, I added coordinating twine from Doodlebug. A closer look...

For my last project, I wanted to make some cute post it notes to put in my hubby's lunch or on the bathroom mirror or to leave him a message of who called or...well, you get the idea....

So I took some yellow post-it notes and stamped them with THIS Hero background stamp in blue. Then I die-cut them into the shape of notebook paper (die from Paper Smooches) and added some sentiments from THIS Neat and Tangled stamp set. To finish it off, I rounded the bottom corners. A closer look...
Well, I hope you were inspired to create some masculine cards. Father's Day is just around the corner! :) Have a great weekend. Thanks so much for stopping by!

Thursday, May 16, 2013

On Trend: Triangles

Hi friends. Today I have three cards to share. All the same design but with three different looks. Triangles are very trendy right now so I decided to break out THIS banner/flag stamp set and just use the outline images to create a triangle design....
A closer look at the first card...loving the gray/yellow combo (just used this combo to decorate our master bedroom)...

Next card close up....

and the final card close up shot...
So to create these cards, I used this recipe...

1.Stamp a background onto a card base.
2.Gather several different pattern papers that coordinate.
(1st card-Studio Calico papers, 2nd card-Project Life papers, and 3rd card-Lawn Fawn papers)
3.Stamp the outline banner images onto different pattern papers and cut out.
4. Create a triangle pattern design you like and adhere it to the front of the card.
5.Stamp your greeting on a strip of pattern paper and adhere it with washi tape.
6.Add a few gems for some bling.

(ALL STAMPS USED ARE FROM HERO ARTS)

*On every card, the two largest triangles are covered in glossy accents. It gives great dimension and keeps the card pretty flat so it can go through the mail easily.


I always like to make several cards of the same design and just mix it up with patterned paper or embellishments. I figure why not do it while all of your supplies are out. :)

I hope you have a great day...Thanks for stopping by!

Tuesday, May 7, 2013

The Bra Card...

Yep, you read that right. I made a bra card. Now before you giggle, let me show you how cool it is....I took THIS awesome stamp and created a card for a dear friend who is moving into a new home.

Here is the front of the card without the gift card....
...and with the Ikea gift card that a group of us got her...
The stamp packaging showed an idea of putting money inside the bra as a gift, which is cute, but I thought the gift card would be fun! There was lots of paper piecing going on to create this card and I love how the pool colored pieces looks like lace in real life with a little dry embossing. :)
I wanted the inside to have a cheeky greeting so I signed it from her "BOSOM" BUDDIES. Hee Hee.
Most of that greeting was from my computer but I did stamp the "congratulations". It's from THIS great set.

Thanks for stopping by!