Today I wanted to share some Easter treats I've been working on....
I've hoarded, I mean collected, these plastic tubes for awhile now and filled them with tiny marshmallows to give to my nieces and nephews tomorrow. Here is a close up of the tag using THIS favorite stamp of mine..
To create the tag....
1. Stamp the bunny stamp onto white cardstock using VersaMark black ultra fine ink and sprinkle clear embossing powder on top. Shake off excess powder and heat set.
2. Using THIS frame die-cut, cut your image out to create a tag.
3. Apply some glossy accents to the tails and press on some velvet flock to make the tails "fuzzy".
4. Punch a hole on the left side of the tag and add a blue circle around the hole punched out of pool layering paper.
5. Print out "Bunny Tails" onto some white cardstock. (I used the Print Clearly Font) and mat it in the pool layering paper. Attach it to the tag.
Another fun idea for bunny tails would be white gumballs in place of the marshmallows. Speaking of bubble gum, I HAVE AN EXTRA HERO ARTS BUBBLE GUM INK PAD TO GIVEAWAY...
Just leave a comment to be entered for a chance to win. I will draw a name next Thursday morning (April 3rd).
Thanks for stopping by! Happy Easter!
Saturday, March 30, 2013
Thursday, March 14, 2013
NEON
I didn't think I would jump on the neon bandwagon, but I did. :) I recently went shopping and spotted some neon nail polish that I had to get for a friend and it inspired me to break out my neon inks and create a card to go with it....
I added the sentiment from the Hero Arts Glow Girl Stamp Set and colored it in with a sparkle pen and finished it off with some metallic string that I found in the Target Dollar Spot...
I'm now loving the neon. How about you? Have you tried it yet?
Thanks for stopping by! :)
Thursday, February 28, 2013
Store Bought with a Handmade Touch...
Hello friends. Since I shared Aiden's birthday pictures on the last post, I'd thought I'd show you the thank you cards I'm sending out to the guests. I bought a pack of monster thank you cards from the store but they felt kinda plain so I gave them a handmade touch.
The pack had more than enough cards that I would need so I took the extras and cut up the pieces that I wanted to double up......
I decided to mount the front piece of the store bought card to a Hero Arts notecard. Then I added googly eyes to both monsters and as for the extra red monster I cut up....
I added him on top of the matching image with a spring...
Now I just have to include some pictures of the party inside the card and they are ready to be mailed!
The pack had more than enough cards that I would need so I took the extras and cut up the pieces that I wanted to double up......
I decided to mount the front piece of the store bought card to a Hero Arts notecard. Then I added googly eyes to both monsters and as for the extra red monster I cut up....
I added him on top of the matching image with a spring...
...so the kids will get a kick out of the lil' dancing monster. :)
Now I just have to include some pictures of the party inside the card and they are ready to be mailed!
Thanks for stopping by!
Thursday, February 21, 2013
Aiden's First Birthday..MONSTER PARTY!
I love to plan a party. I love everything about it but mostly, I love the details. I will be the first one to admit that I tend to go a little overboard with party planning but it feeds my creative soul. I just love it. Today I want to share with you what I did for this little guys first birthday party last week....
One of the secrets that I'll share with planning a child's birthday party (or for any party) is to PLAN EARLY! My sister (my party planning sidekick) and I talked about Aiden's theme for his first birthday while I was pregnant! LOL The reason for this? Because you will find SO much that will fit your theme when your not even looking. I kept everything in a tote and bought anything that I loved. For example, I found a few things in the Target dollar spot. If I hadn't known my theme, those items would no longer be there when I need them.
So this year's theme was MONSTERS. As you can see in Aiden's photo (above), he had his fun to be one monster bib and underneath? a lil' cake monster outfit. :) Okay, onto the party details....the monster lootbags....
These were fun to make. I just added some googly eyes to colored bags and drew faces with markers. I printed out each child's name and then used a banner die-cut to cut them out. A peek inside the bags...
Monster stickers, monster buttons, monster rings, monster stuffed animals, monster pencils, monster finger puppets, monster fruit snacks, monster tatoos, monster coloring books, and monster crayons(not pictured).
Onto the menu...
You will have to forgive me on the lack of photos here. That is the one thing that I slacked on. It's REALLY difficult to be hostess, mommy, chef, organizer, kid activity leader, and photographer all at the same time! So the MONSTER MENU (which was all written on a chalkboard) consisted of (for the adults). Ted's famous chili, hot ham and cheese sandwiches and for the kids, Monster grilled cheeses.....
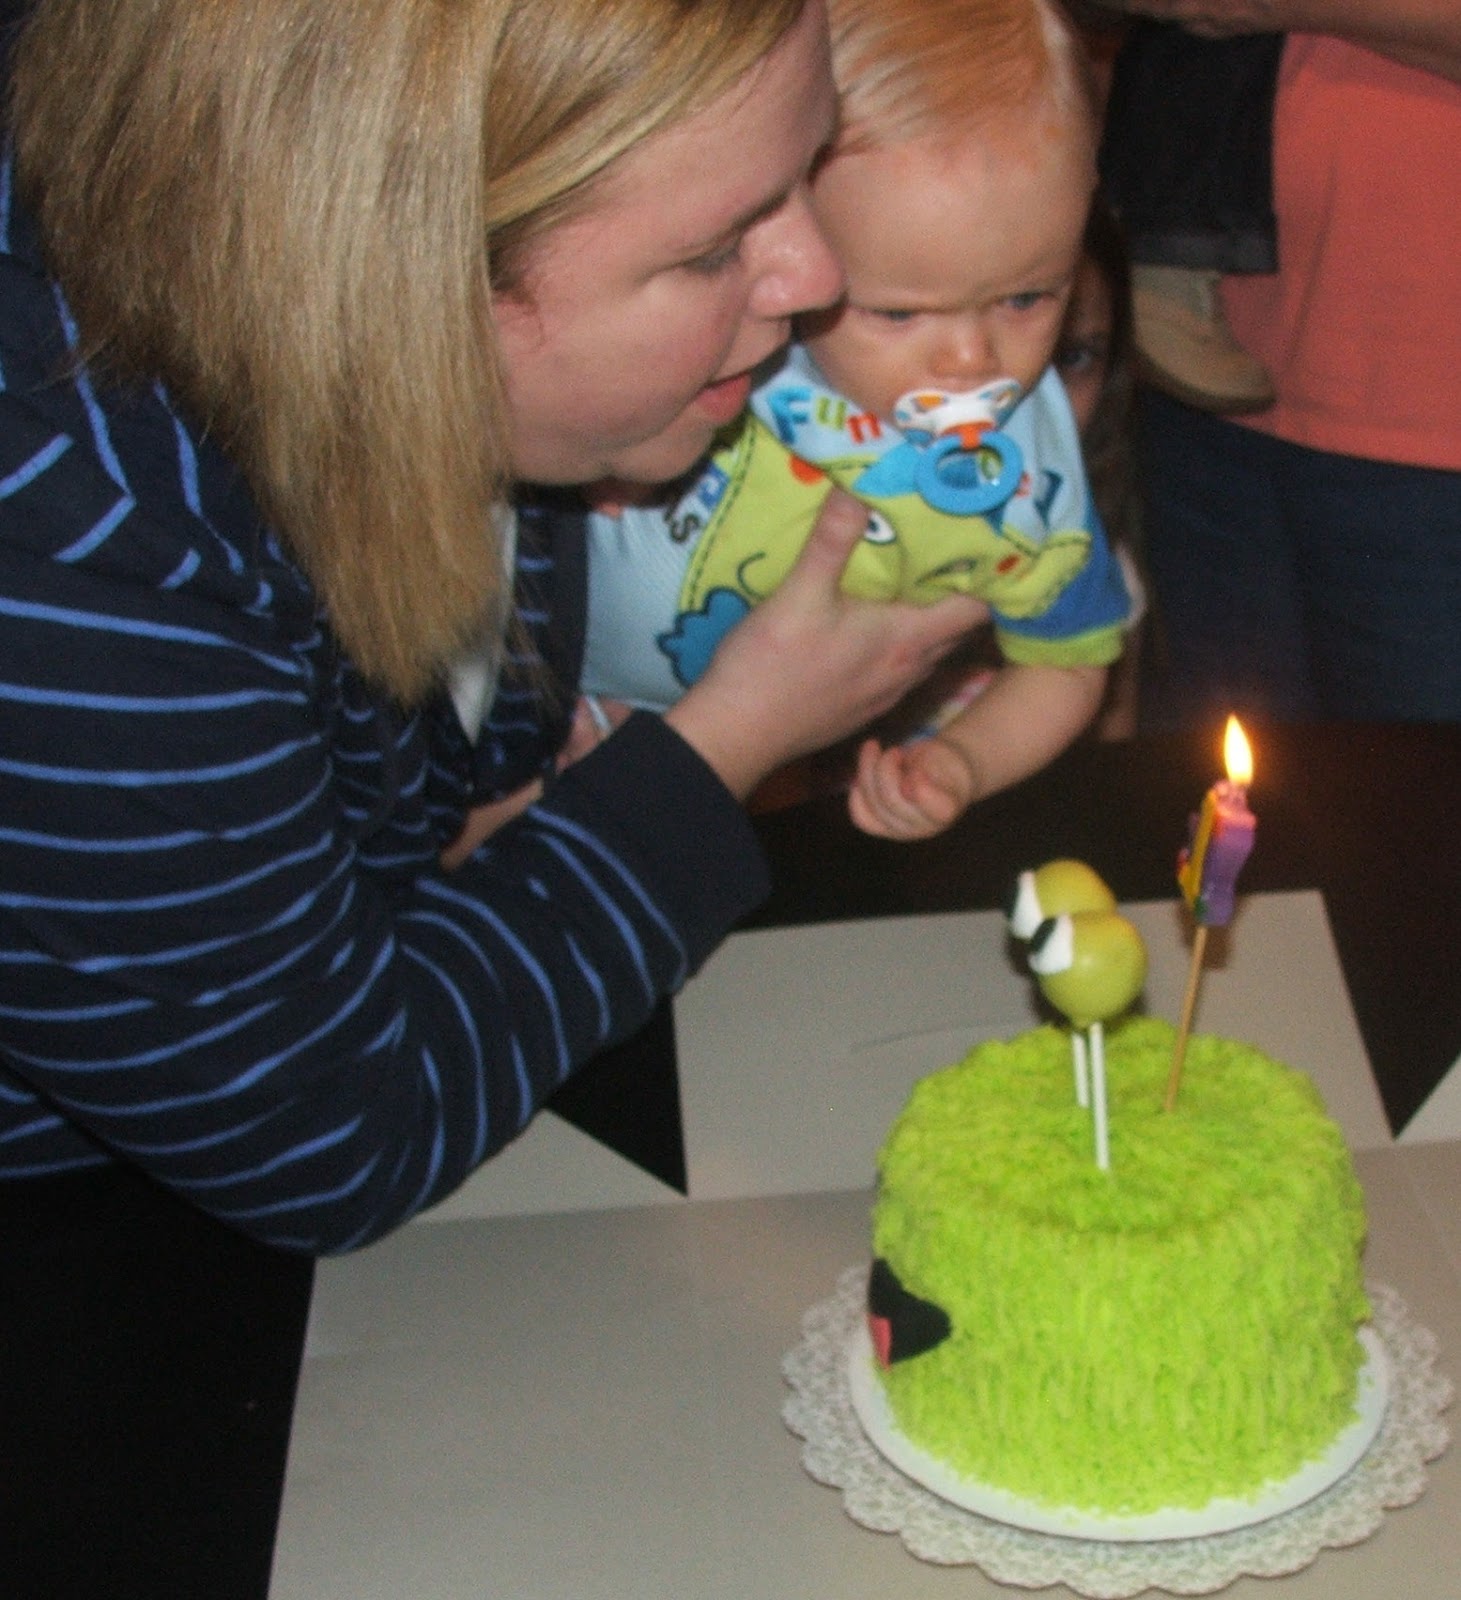
Aiden was hesitant about the cake from the start. LOL ...
Even maw-maw tried to convince him...
She even tried a cupcake....not happening...lol
but Aiden's cousin, Molly LOVED it...
Onto the activities...I knew I wanted the kids to have something to do while guests arrive and the food was being prepared so I got sweet Alex to draw me some monsters on posterboard and taped them to the wall. I did this because I knew I wanted them to color but wanted something different then just having them color at the table. The kids LOVED it. I think it made them feel like artists and they were happy to show off their masterpieces...
Cousin Taylor...
and Cousin Lydia...
The kids also worked on making monster masks...
J.T. was happy to pose for me...
and Taylor..
Oh, see that stamp on Taylor's hand? That was a "prize" for playing a game. Stamps are a great prize and are usually something that you already have on hand.
Not only did Alex help with the drawing of the monsters, but he also helped by putting on the monster tattoos...
His girlfriend Ashley also helped by giving the girls a monster manicure. These two are the best teenagers in the world...
I also wanted something fun for Aiden and Molly to do...they LOVED the ball pit...very age appropriate for them. Oh, and that is a crab swimming pool that I turned into a ball pit..it looked just like a monster....
The kids also had fun playing monster bowling. Aiden just liked watching...
I also had the kids help me make glow in the dark monster slime. They actually took it into the bathroom, turned off the lights and yelled, "It really glows!". I had some monster ziplock bags to put it in....
And if only a picture had sound!Whenever we would say, "Be a Monster Aiden!"...he would say, "rawr". This is how it looks...lol....
And every little detail was worth it to make this little guy smile...
So this year's theme was MONSTERS. As you can see in Aiden's photo (above), he had his fun to be one monster bib and underneath? a lil' cake monster outfit. :) Okay, onto the party details....the monster lootbags....
These were fun to make. I just added some googly eyes to colored bags and drew faces with markers. I printed out each child's name and then used a banner die-cut to cut them out. A peek inside the bags...
Monster stickers, monster buttons, monster rings, monster stuffed animals, monster pencils, monster finger puppets, monster fruit snacks, monster tatoos, monster coloring books, and monster crayons(not pictured).
Onto the menu...
You will have to forgive me on the lack of photos here. That is the one thing that I slacked on. It's REALLY difficult to be hostess, mommy, chef, organizer, kid activity leader, and photographer all at the same time! So the MONSTER MENU (which was all written on a chalkboard) consisted of (for the adults). Ted's famous chili, hot ham and cheese sandwiches and for the kids, Monster grilled cheeses.....
Don't worry about all those crusts...they didn't go to waste....my dad was caught eating all of them... :)
Off the subject but in the picture you can see I had out Aiden's first year scrapbook (very proud to say it's completed!) and a slideshow of pics of him from his first year on my Ipad.
Okay, back to food....
I had monster fruit kabobs to go with the monster grilled cheese...
Okay, back to food....
I had monster fruit kabobs to go with the monster grilled cheese...
and some popcorn to snack on. I found some paper loot bags that worked out great to hold the popcorn. All the food was a big hit! ...
I can't forget to share the cake. My super gifted friend Christy made Aiden a monster cake.....
and cake pop monster eyes for the guests...
Aiden was hesitant about the cake from the start. LOL ...
Even maw-maw tried to convince him...
She even tried a cupcake....not happening...lol
but Aiden's cousin, Molly LOVED it...
Onto the activities...I knew I wanted the kids to have something to do while guests arrive and the food was being prepared so I got sweet Alex to draw me some monsters on posterboard and taped them to the wall. I did this because I knew I wanted them to color but wanted something different then just having them color at the table. The kids LOVED it. I think it made them feel like artists and they were happy to show off their masterpieces...
Cousin Taylor...
and Cousin Lydia...
The kids also worked on making monster masks...
J.T. was happy to pose for me...
and Taylor..
Oh, see that stamp on Taylor's hand? That was a "prize" for playing a game. Stamps are a great prize and are usually something that you already have on hand.
Not only did Alex help with the drawing of the monsters, but he also helped by putting on the monster tattoos...
His girlfriend Ashley also helped by giving the girls a monster manicure. These two are the best teenagers in the world...
I also wanted something fun for Aiden and Molly to do...they LOVED the ball pit...very age appropriate for them. Oh, and that is a crab swimming pool that I turned into a ball pit..it looked just like a monster....
The kids also had fun playing monster bowling. Aiden just liked watching...
I also had the kids help me make glow in the dark monster slime. They actually took it into the bathroom, turned off the lights and yelled, "It really glows!". I had some monster ziplock bags to put it in....
This little guy had fun opening presents...
The drum that mommy and dadd got him was one of his favorites. I think he will take after his brother...And if only a picture had sound!Whenever we would say, "Be a Monster Aiden!"...he would say, "rawr". This is how it looks...lol....
And every little detail was worth it to make this little guy smile...
I love you sweet boy. Happy first birthday! :)
Tuesday, February 12, 2013
Have a "KOOL" Valentine's Day...
Hello friends. I wanted to share Aiden's valentines that he will be sending out this year to cousins and friends. I was searching on Pinterest (addicting isn't it?!) and found THIS cute idea! I love that she offers a downloadable PDF but I wanted to make my own....
I used that Doodlebug heart washi tape to secure the kool-aid but also to secure the straw that was on the back...
I found these envelopes in my stash that were PERFECT...
I used the washi tape again to secure the envelopes...
All ready to be sent out! I thought I would mail them this year because I've never met a kid who doesn't LOVE getting mail ....
Happy Valentine's Day! Hugs.
Wednesday, January 30, 2013
Make it work...
I applied the "Make it Work" quote from Tim Gunn while working on this card set...
You ever have an idea in your head for awhile and then go to implement it and it looks NOTHING like what you imagined? That's what happened with these cards. I originally had the flower background on the front of a kraft notecard and colored it with Inktense colored pencils. It looked really bad. So I "made it work" by coloring the flowers with Copics instead, die-cutting the background, and layering it onto some Bo-Bunny dot paper and Neenah Desert Storm cardstock. I finished it off with some string and a pearl on the bow. Oh, and I also did some faux stitching along the left hand side with a white pen.
A closer look...
I hope I've inspired you to not throw in the towel on your next crafting project that doesn't go as planned. "Make it work!" :)
Be back soon. Thanks for stopping by!
Sunday, January 27, 2013
Before I forget....
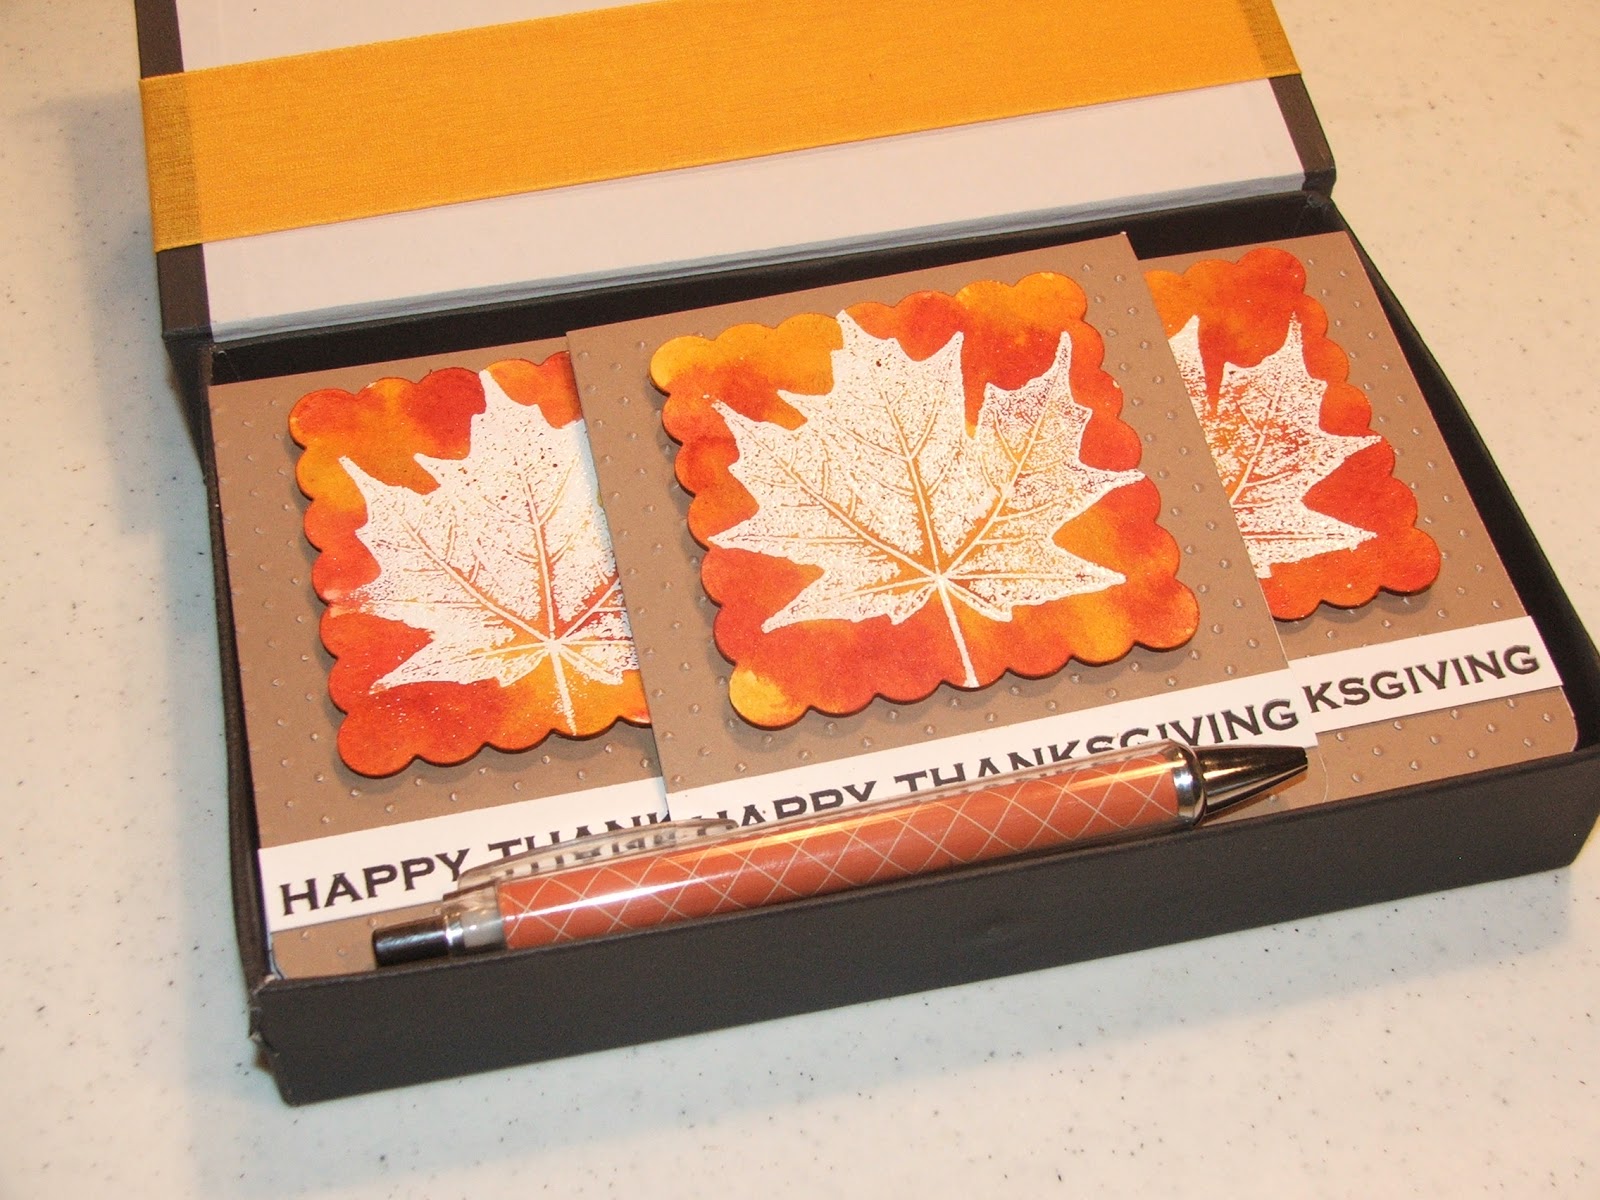
I was organizing some photos when I realized I forgot to share some of the gifts I made over the holidays. First up is a card set I created for my hairdresser. She doesn't send out Christmas cards to her clients. Instead, she sends out Thanksgiving cards. So I thought I would give her a Thanksgiving card set for Christmas that she could use next year.....
I created the scalloped piece by heat embossing a Hero Arts leaf onto watercolor paper using white embossing powder. Then I dotted on THIS and THIS all over the piece and spayed it heavily with pearlized water. The look is amazing in real life. Here they are all packaged up with a pretty pen...
I also noticed that Kay didn't have a timer so I found this cute owl timer to go with her gift....I also made some Christmas cards for my nephew's teachers. I used heat embossing and distress ink to achieve the look on the banner...(The greeting is from Hero Arts and the dotted background is from Papertrey)
One more...A little note card set I made for Aiden's pediatrician. I paired it up with some candy....
And all those cute pens? I get them in the Target Dollar Spot. I have quite a collection and find its great to pair up with notecards as a gift. :)
Be back soon. Thanks for stopping by.
Subscribe to:
Posts (Atom)