Saturday, June 1, 2013

Guest Designer...

I am honored to be a guest designer over at A Blog Named Hero (one of my favorite blogs). Their theme/challenge for this month is masculine and they are featuring Neat and Tangled Stamps, which I am SO excited about. Danielle Walls is the owner/creator of Neat and Tangled Stamps and not only are her stamps adorable and high quality but so is she! I had the pleasure of crafting with her at a couple of retreats and she is super sweet.

Here are the projects I came up with. The first one is a card for my hubby for Father's day...
I used the woodgrain border stamp from THIS set along the bottom of the card to create my own patterned paper. I liked that it felt masculine. THIS stamp set from Hero Arts is great for masculine cards and I used it for the sentiment. For the two smaller colored cardstock strips, I used Hero's Butter Bar Ink and Wet Cement Ink and just swiped them along a piece of white cardstock. For the pool colored larger strip, I stamped THIS Hero Background with Tide Pool Ink. I added glossy accents to the wooden hearts. A closer look...

For my next card (the one featured on the A Blog Named Hero Blog), I was looking for some color inspiration and found it on the ink cubes sitting on my work station...

I think they fit the masculine theme so I created this card...

I absolutely love THIS stamp from Neat and Tangled and knew I had to use it. I stamped it with Wet Cement onto white cardstock. I stamped the greeting from THIS Hero set using Black Staz-On ink onto acetate and stapled it on my card. Then I added some die-cut stars that I swiped with the ink colors from above cube set and then gave them some shine with glossy accents. To finish it off, I added coordinating twine from Doodlebug. A closer look...

For my last project, I wanted to make some cute post it notes to put in my hubby's lunch or on the bathroom mirror or to leave him a message of who called or...well, you get the idea....

So I took some yellow post-it notes and stamped them with THIS Hero background stamp in blue. Then I die-cut them into the shape of notebook paper (die from Paper Smooches) and added some sentiments from THIS Neat and Tangled stamp set. To finish it off, I rounded the bottom corners. A closer look...
Well, I hope you were inspired to create some masculine cards. Father's Day is just around the corner! :) Have a great weekend. Thanks so much for stopping by!

Thursday, May 16, 2013

On Trend: Triangles

Hi friends. Today I have three cards to share. All the same design but with three different looks. Triangles are very trendy right now so I decided to break out THIS banner/flag stamp set and just use the outline images to create a triangle design....
A closer look at the first card...loving the gray/yellow combo (just used this combo to decorate our master bedroom)...

Next card close up....

and the final card close up shot...
So to create these cards, I used this recipe...

1.Stamp a background onto a card base.
2.Gather several different pattern papers that coordinate.
(1st card-Studio Calico papers, 2nd card-Project Life papers, and 3rd card-Lawn Fawn papers)
3.Stamp the outline banner images onto different pattern papers and cut out.
4. Create a triangle pattern design you like and adhere it to the front of the card.
5.Stamp your greeting on a strip of pattern paper and adhere it with washi tape.
6.Add a few gems for some bling.

(ALL STAMPS USED ARE FROM HERO ARTS)

*On every card, the two largest triangles are covered in glossy accents. It gives great dimension and keeps the card pretty flat so it can go through the mail easily.


I always like to make several cards of the same design and just mix it up with patterned paper or embellishments. I figure why not do it while all of your supplies are out. :)

I hope you have a great day...Thanks for stopping by!

Tuesday, May 7, 2013

The Bra Card...

Yep, you read that right. I made a bra card. Now before you giggle, let me show you how cool it is....I took THIS awesome stamp and created a card for a dear friend who is moving into a new home.

Here is the front of the card without the gift card....
...and with the Ikea gift card that a group of us got her...
The stamp packaging showed an idea of putting money inside the bra as a gift, which is cute, but I thought the gift card would be fun! There was lots of paper piecing going on to create this card and I love how the pool colored pieces looks like lace in real life with a little dry embossing. :)
I wanted the inside to have a cheeky greeting so I signed it from her "BOSOM" BUDDIES. Hee Hee.
Most of that greeting was from my computer but I did stamp the "congratulations". It's from THIS great set.

Thanks for stopping by! 

Friday, May 3, 2013

XL Teacher Thank You...

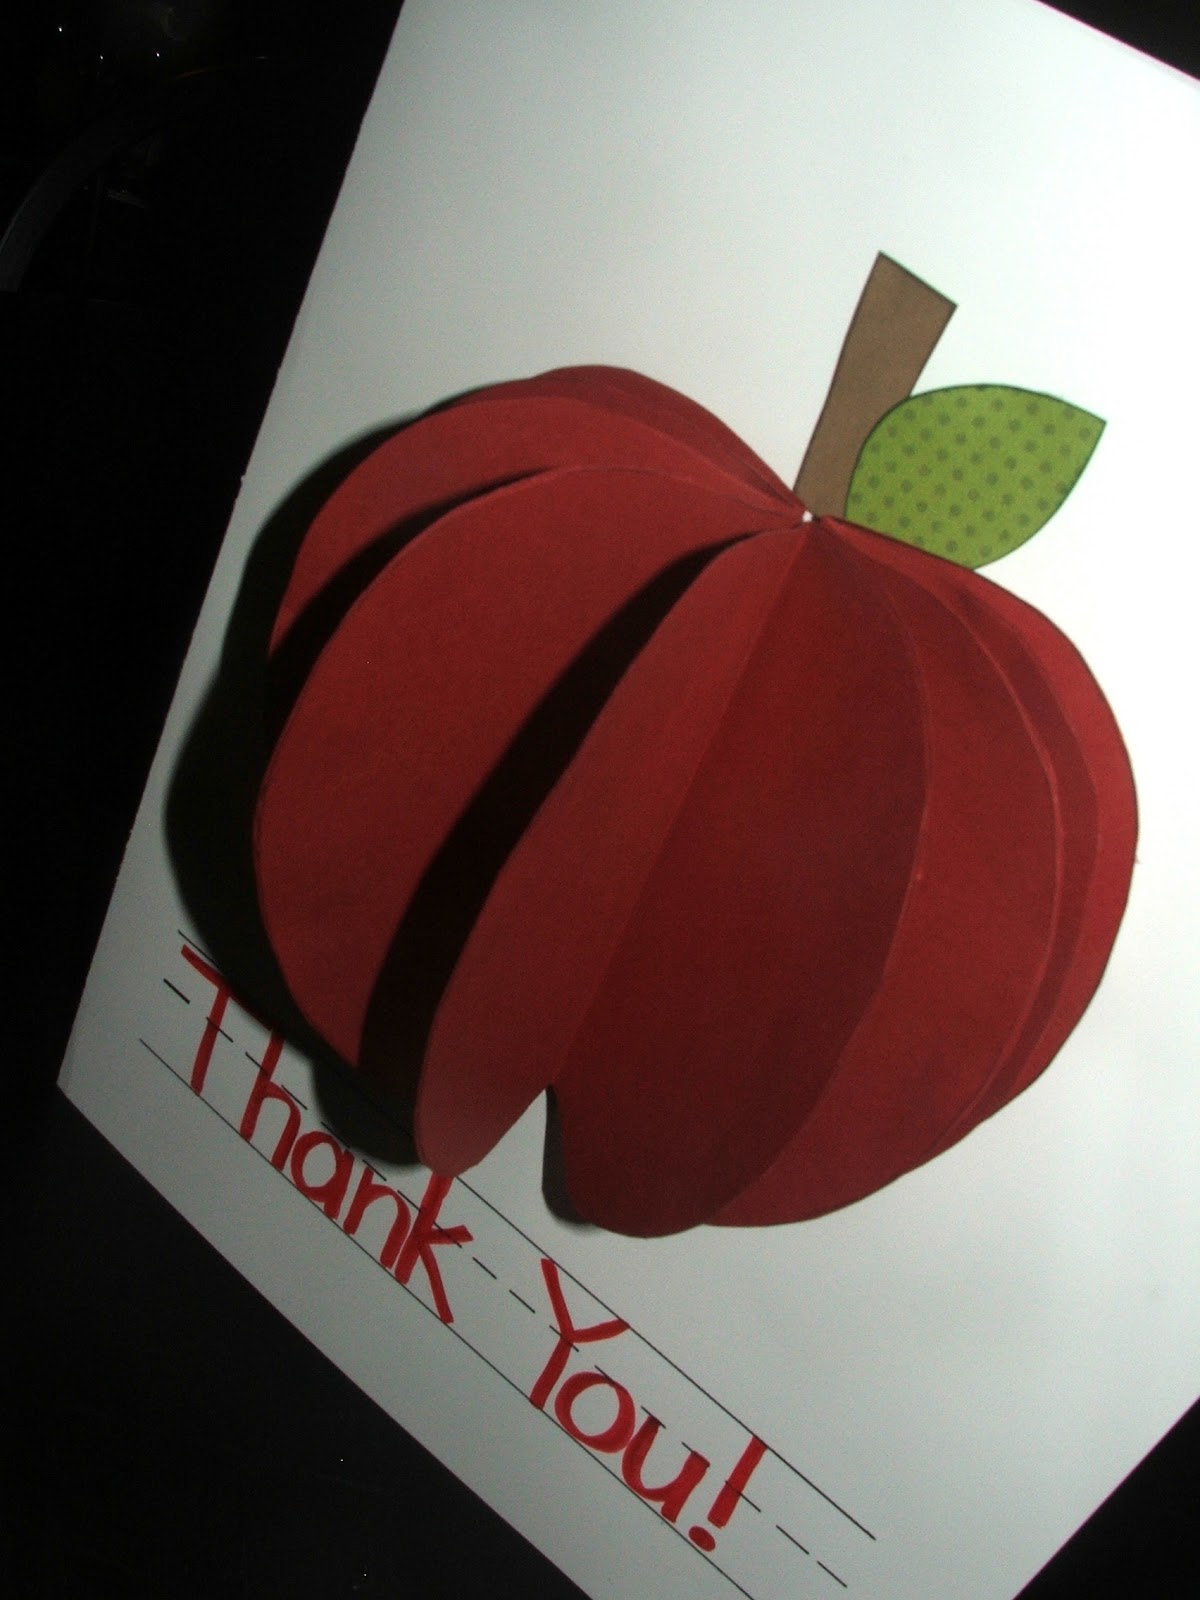
So my sister calls me the other day and asks for my help. My nephew's teacher asked her to make a card for the entire class to sign for the student teacher that has been helping her out this year. My sister asked if I had any ideas and I immediately thought of Jennifer's FABULOUS Dimensional apple tag. I thought it might be fun to do a supper sized apple. :)

Here is the card. It doesn't look too big in the pic but it is huge. I took a poster board, cut it in half, and then folded one half to create the card. It is plenty big for his class to sign....

Jennifer used an apple die for her tag but there is no apple die this big so I created one. I found an apple outline image during a web search, printed it, and then made an enlarged copy of it. (If you try this, just remember whatever image you use, MUST be a mirror image when you fold it in half!) I traced the image eight times onto red cardstock. Then I cut each one out, folded each in half and starting adhering each one to each other. Such a fun technique.

The photos really don't do it justice. It is so neat in real life...
For the "Thank You" at the bottom, I just drew a sentence strip and wrote Thank You on it. Easy Peasy...

Aren't teachers the best?! I was a Preschool teacher for many years and I know first hand how much it is appreciated when all of your hard work is noticed. :)

Have a great weekend! Thanks for stopping by!

Monday, April 22, 2013

MUSIC MONDAY

I haven't done a MUSIC MONDAY in what seems like forever. So here's 5 songs on my ipod right now that I love...

Friday, April 12, 2013

Retreat Cards..


Hi friends. Before I get to today's cards, the winner of the Stampin' Up goodies from last post is CHARK! Congrats. Email me your address and I'll get your goodies to you.

Today, I have three cards to share that I made last weekend at a crafting retreat. I worked on Aiden's scrapbook for most of the weekend but did manage to get a few cards done!

The weekend was amazing. I was surronded by the most amazingly talented group of women. Not only are they talented, but have hearts of gold. Teri was one of these women and I was lucky enough to play with some of the stamps that she designs. LOVE her stamps. Good stuff. (Sorry for dark pics..posting in a hurry...no time to edit) ....

I love that I could be super simple with these cards and let her stamps take center stage...
This one for my hubby...
Last one..
 
Thanks for stopping by. Hope you have a fabulous weekend! 

Thursday, April 4, 2013

Another Giveaway!! (Stampin' Up)

Hello friends. Today I have ANOTHER GIVEAWAY for you but first I wanted to announce the winner of the Bubble Gum ink pad from the last post....Congratulations Sara! Email me you address and I will send out your goodies. :)

So I recently received an email from Stampin' Up asking if I would like to work with some of their products that they are releasing in June. I happily accepted the invitation and they sent me the adorable "A Round Array" 6 piece stamp set and the yummy 7/8" scallop punch. I loved working with the products so much that I created THREE cards. :) Here's a peek at them...

As you can see, I decided to keep the same design for all three but mixed up the colors and greetings. Here is the first one. A Thank You card...
A For You card...
 and a You Make Me Smile card...
To create this card....

1. Stamp the open scallop image in VersaMark ink randomly on your card. Sprinkle white embossing powder on top of each one and heat set.

2. Stamp coordinating color of ink (that matches your patterned paper) randomly on your card too. The embossed image will create a cool ghost look next to them. :)

3. Punch a large scalloped circle out of patterned paper and adhere it to the right, lower section of your card.

4. Cut an inch strip of gray cardstock and punch 4 scalloped circles out of coordinating patterned paper. Decorate them with brads, buttons, string, and pearls.

5. For the last scalloped circle, Stamp a sentiment from the "A Round Array" Stampin' Up stamp set in grey ink then line up your Stampin' Up Scallop punch to match them image and punch it out.

6. Adhere all the scalloped circles onto the strip of cardstock.

7. Ink the edges of your card with grey ink.

8. Adhere the strip of scallop circles to the card.

NOW FOR THE GIVEAWAY....Stampin' Up was so generous and sent me another set of all the goodies (plus a clear acrylic block) to give away to one of my blog readers...
Just leave a comment to this post and I will pick one lucky winner one week from today (April 11th). Good luck!

Thanks for stopping by!